Posted in Container, Flowers, Gardening

Recycled Planter Boxes

A lot of garden recycling often looks used and recycled. A lot of art in the garden is from recycled products. It give the garden a talking point, or make the garden turn into a bit of fun. It may introduce a theme if the objects have a connection to each other.

Turning something old, and unusable for its initial purpose and turning it into something usable in the the garden is fun. While there is nothing wrong with this if that is the look you want, sometimes you want to recycle and hide the fact that it is made from something that has been recycled.

My planter box idea can be made almost totally from recycled materials. The only thing you may need to purchase is screws, but if you have some old unused ones (as I did) then you may not even have to buy that.

Being recycled also means it is cheap. But that doesn’t mean it has to be cheap looking.

Being recycled often means it sort of works, but that isn’t the case with these planter boxes either!

This blog I am going to show you how to make two different ones out of products you can easily get yourself. Or you can customise it to what you might have available or to fit your needs.

I started by using old fence paillings which you can easily get from a neighbor who is upgrading their fence. Usually the posts rot causing the fence to be replaced, leaving most of the paillings ok to be used. As they are usually old, most of the pain has usually warn off them, making them look great. I’ve made boxes from this wood and it looks far better than new wood. Keep your eye out for neighbours fences that are being re-done and unless you get in the way, they will usually always let you take some. The more you take the less they have to pay to throw away.

I then collected some foam boxes from my local fruit and vegetables shop. They will give you them if you ask for them. I also saw some old ice cream containers outside an ice cream shop. These are the ones that the shop serves from into ice cream cones. You might want to ask your local shop for some.


The foam boxes have drainage holes already, but the ice cream containers do not. Drill plenty of holes, as they can block up easily. You don’t want to plant your seeds into a swimming pool!


With the foam boxes, they can be large enough to let water out, as well as the soil. I have used fabric in the past from an old shirt or bag, but recently tried using plastic which did contain purchase dirt from the nursery. Just make sure the water can drain away.

The next step is to cut your fence paillings to size so they go around your containers. I put three ice cream containers together and for the other one I used one foam box. Make a little bit of space around the container so you box can be lifted off.


I put some blocks of wood lose in the bottom of my box to lift the containers up to the height I wanted. As you can see, I also painted it. While this is not necessary, it will help make the wood last longer and prevent rot as you water your planter box. It is up to you if you paint or not and what colour you select.


Next plant up you containers and place them inside your box. In my photo you can easily see the white container, but in time the plants should grow over it. The white container is lower than my box which also helps hide it.


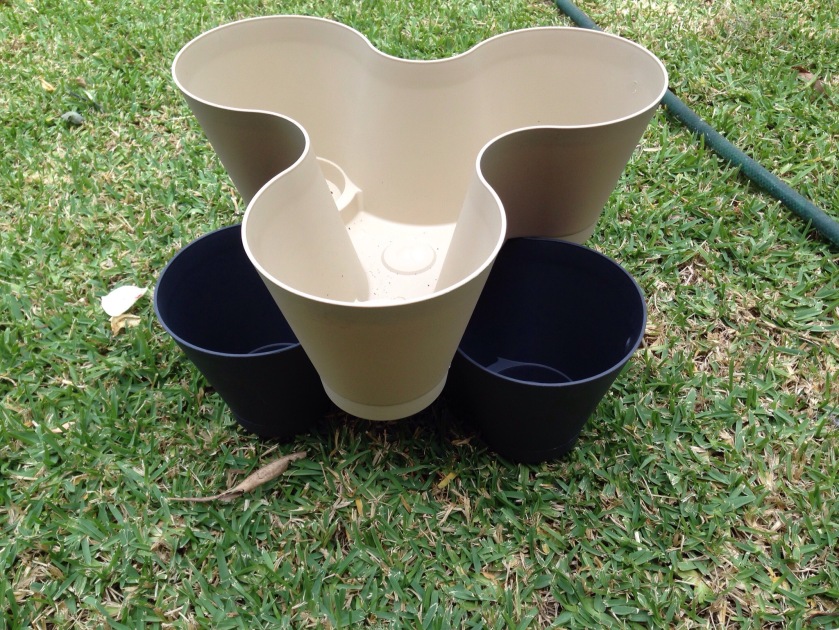
My black ice cream containers look good inside my black box.

You can grow flowers, vegetables, herbs, or even cuttings in these boxes. You can even modify this design to include a glass cover to protect your plants from frost. But that’s not the best thing about this recycled planter boxes.

The other great benefit to this box.

When you get your containers, try to get at least twice as many as you need


This container is busy growing plants for my boxes which are on display out the front. When the plants in the boxes have had their season, or have outgrown the container, they can easily be moved from the box and replaced with the ones around the back so the boxes always look their best.


Not only is it made from recycled materials, it is practical and looks good. You wouldn’t know it was cheap to make.

Posted in Vegetable

Preparing for Winter

In Australia the difference between summer and winter can be extreme. Both seasons can make us take cover for opposite reasons. 

Our gardens also have to survive both seasons outside. Some plants are tough and do survive Australias hot summers with minimal water and then endure the frosts of winter and sometimes living in damp conditions. Australia has hot summer winds that can dry plants out in a short period, and cold iceberg type winds in winter that can freeze water and liquid in plants. 

When it comes to the vegetable garden, most plants don’t grow all year and thrive in their season. When they are in the wrong season, they got to seed and finish for the year. 

However a greenhouse can sometimes help a plant extend its life into the next season or get a head start on other plants before its season starts. 

A greenhouse can also help a plant survive winter and then pick up where it left off from last autumn like my capsicums. So far my capsicum plants have lasted three years and in my climate should only last the warmer seasons. 


To help them survive through winter I have built a greenhouse to protect them from frosts and wind. They also remain warmer inside the greenhouse also. 

It not only protects them from the winter elements, but extends their season also. 

Each year the plant continues to grow from where it left off from last year. As a result of this, each year I have to build a bigger and taller greenhouse as last years house no longer fits the plants!


This year I made it completely from scrap wood. I rested it on blocks so my frame doesn’t rot, but the blocks do which can be replaced easily. 


I have it braced so it doesn’t bow in the wind. It’s roof it tilted towards the back which is uphill. This way the rain from the roof will flow off towards the back then flow under the greenhouse wall to the plants. 


I have also tied it down so the wind doesn’t blow the cover away. There is a bit of a gap at the bottom no the front to allow some air movement but not allow the frosts to come in and damage the plant. 

You way want to use clear plastic rather than what I am using, but remember it will allow more light in and potentially cook the plant. The plastic I have used is thick, will last several years, and was what I already had in the shed. 

In addition to this I do have other greenhouses, but this one is my tallest one that is made specifically for the vegetable garden.  

Posted in Flowers

Repotting Orchids

‪I’m about to re-pot one of my orchids now. You can see how much dead growth is in the pot. 


‪Remove it from the pot. Then hold onto the dead bulbs and twist to remove from roots. Then seperate the growing ones for repotting‬. 


‪When repotting an orchid keep the healthy ones together and remove yellow leaves. Split clumps into small groups‬. Keep as much roots on as possible. 


‪When replanting garden orchids group them together in the centre of the pot as they grow outward. Some cut the leaves by 2/3 rds ‬to reduce stress but I don’t. 


‪When replanting garden orchids plant to the same depth as before. Protect drain holes by placing something over them like an old terricota pot bits. Make sure you use orchid mix‬ as it must be free draining. 


‪Here they are, my re-potted and divided orchids in my garden ready for another season. You may not get many flowers the first year‬, but you should get heaps next year. 

Posted in Garden, Pests and diseases

Rats in the Garden 

It is very disheartening seeing your produce been attacked by rodents just before it is ready. After soil preperation, cultivating and nurturing your veggie garden, a rodent will happily enjoy your hard work and not even thank you. Worse still they often don’t finish what they started. They will take a bite or two then leave it behind. As they spread desises on your property, there is no option but they have to go.

The first step is to be proactive rather than reactive. You can do this by making sure there is no old fruit or vegetables on the ground rotting. Being on the ground makes it easy pray. Having said that, rodents may leave them there are go for the good stuff, the stuff you have your eyes on also.

Some fruit such as tomatoes will ripen inside. So as soon as they start to show some colour, pick them and put them inside in a warm place away from your attackers.

Know your edomy

First you have to be sure it is a rodent and try to see what size. You can tell this by the poo they leave behind. It could easily be something else, so be as sure as you can be before you catch the wrong predator.

Once you are sure it is a rat or mouse, have a look at what they are actually eating. Then for a few days actually feed them that in a place nearby where you can later set the trap. This is far better than getting bait, as the rat is already used to seeing what they are currently eating, but not used to seeing bait in the area. For instance, if it was apples, pick some and put them on the ground in a place so the rats will eat these picked apples, rather than the ones up the tree. Have a rat trap next to them, but do not set the trap at first.

After a few days, they will have got used to seeing the trap, so set the trap. Rats are clever animals so if you set the trap to early, they may try to work out how to get the food off the trap without it going off.

  
Another way is to set some bait without a trap. This poisoned bait will attack the rats organs and kill the rat. From personal experience, I have done this and later heard a rat scream in pain a little while later – not something I forgot in a hurry.

There are two problems with this method.
1. Depending on the size of the rat, it could take several days, even up to a month to kill the rat. Meanwhile your produce is still being eaten and there could also be new babies born.
2. If the dead rat is eaten by another animal, such as a dog or cat, it also could get very sick. Worse still, a young child could start playing with it as they often seem to die out in the open, rather than underground. Even their urine while they have taken the bait is harmful to your garden.

Posted in Pests and diseases

Citrus leaf miner

Citrus leaf miner is most common during summer and autumn and can affects all citrus. The grub tunnels inside new leaf growth, forming a silvery pattern and distorting the leaves. The new affected leaves look like they have melted a bit and roll up. 


Heavy infestations will stunt growth, but rarely kill a tree. Damage can be controlled by cutting off the affected parts and spraying with homemade oil spray to deter the moth from laying eggs. Put pruned branches in the rubbish bin. 

Posted in Container

Container Gardening

Container gardening is the practice of growing plants, fruits, flowers and vegetables, in pots or any other containers available at hand.

Container gardening can be one of the easiest, cheapest, and simplest ways to have your own garden and to grow your own food.

If you are new to gardening, then container gardening is for you. It is as cheap or expensive as you want it to be and doesn’t require much room. You can move the plants if they are in the wrong climate. 


 Some other benefits to container gardening include:

  • You only need a container, some soil and seeds or a seedling. You can use an old bucket and punch drainage holes in it for drainage as you don’t want to grow your plants in a mud pie   
  • You don’t need to buy land, depending on the plant, it can be on your porch or inside. You may want to try a vertical garden; I made one out of old pallets
  • If your soil isn’t right in the garden, then it will not effect the plants in the containers. Your garden soil might be contaminated, have the wrong pH or be sand or clay. With containers you can create the correct type of soils for each plant. Some like sandy free draining soil, were others like moisture retaining soil. Containers give you the opportunity to give your plants the best possible soil. With containers, plants with different soil requirements can live happily next to each other   
  • If your property has existing tall trees, such as gum trees that take a lot of the nutrients from your soil, container gardens are often the only option. Lots of large trees often have roots at or just below ground level, leaving minimal soil for any additional plants. Plants such as citrus trees do not like their shallow roots disturbed 
  • Container gardening allows you to grow things you wouldn’t normally be able to grow in your area. Put your container in a dry sheltered spot with full sun and you might be able to grow a cactus or a vegetable out of season. If you put your container in a wet humid spot, you may be able to grow something tropical
  • It is easier to protect your container garden from pests. You can move the pot to a different area if needed. If one tomato plant gets infected, you can move it away from the others. If the soil in the pot gets contaminated, you can empty the pot, wash the pot and plant a new plant, rather than remove all the dirt from your garden. Your neighbours citrus may have gall wasp, so move your citrus away from theirs
  • Weeds are a lot easier to remove out of containers. Should they do get a foothold in the container, simply replace the soil for a fresh start   
  • Containers are effectively raised garden beds. This allows for better drainage and you don’t have to bend over down to ground level. Put them on a shelf made of bricks to add a different dimension to your container garden. Or have them off the ground for easy reach 
  • Container gardens are more efficient as they require less maintaince and time
  • You can put your containers out of reach from children or pets.  Especially if you have inquisitive children or a dog that likes to dig in the garden 
  • Containers stop plants from spreading, such as mint. Mint grown in the garden is very hard to remove and will take over the entire garden, however when grown in a container, it is a lot easier to keep in control. Containers stop plant roots from getting into house pipes or breaking pathways
  • You can conserve water by only watering the containers that need it. Add some mulch and the moisture will last longer
  • Containers don’t have to be huge or ugly. They can be tall, fat, small, colourful, different shapes and made from different materials. The plant may grow from the top, the sides or be a combination. The pot itself can become a feature with the plant as a bonus. The container might be something you have made, been given from someone special or one you bought while on holiday or a favourite place. The pot may be a combination of different pots that together or near each other make a statement. They can fill a gap quickly or add colour. The plant doesn’t have to be the only thing admired. You can have containers inside pots, so the special pot stays in the same place, however several different container plants rotate through it   
  • You can grow a container garden where you choose and not only where garden beds exist. They can add ascetic value around your home. This could be on the decking, by the front door or on paving. It allows you to soften or brighten up a front entrance, shade a window or block the view of something like an ugly heater or hot water service. You can grow herbs from your kitchen windowsill which may inspire your cooking and look good from inside and outside the house. Start a rooftop garden or fill a courtyard to make it more of an attractive or usable place. You can try a vertical garden up a wall. And don’t forget hanging baskets which allow the plant to grow in the sky and over the edge and down the side like a waterfall   
  • Containers have the power to make rapid changes as you can rotate them. Bring bright flowers out just before visitors arrive and put them back to where you like them, or in the climate the plant needs after they leave. Out the back you could have next seasons flowers germinating in preparation to replace the ones already in flower out the front for all to see. Containers give you more options in designing your garden
  • Container gardens are very kid friendly. They can first paint the pot, then plant it up, then look after in. My children have potted flowers by the front door. They see them each day, and I was hoping they would remember to water them also. It helps them respect plants, learn how they grow and helping them feel responsible 
  • If the plant grows bigger than you expected, you can move it so it doesn’t restrict you being able to move past it or shelter other plants. If you plant the wrong plant in the garden, it could block a garage entrance, drop a mess on the car, create to much shade on a window or block you from getting to a part of the garden. If the plant is in a container, it’s growth will not only be restricted but you can move the plant without any transplant shock
  • Should the plant only get light on one side, you can continually turn the pot so every side of the plant gets the same amount of light. This is particularly good for indoor plants and new germinating plants
  • Containers can bring the outside indoors, even if it is while you have visitors. For example a stunning outdoor plant in full flower could be brought inside for a few hours or days then rotated with other plants creating an ever changing feel inside   
  • You can take your containers with you. This is very useful if you are renting or decide to sell up. If your going on holidays, you can move your favourite ones to a friend or relatives house so they can water them for you. You may have trouble getting them back though
  • You can garden all year with container gardens. No longer do you have to wait for the rain to stop, simply pick up the pot and do what you need to do undercover in the garage or porch out of the rain or hot sun
  • Container gardening allows you to grow young plants in sheltered locations first, such as indoors near a sunny window, or undercover away from frosts or heavy rain. Once established they can then be moved to their next location. Unless the pot isn’t movable, or the roots grow through the pot into the dirt, it never needs to be the final destination   
  • Containers allow you to experiment with different plant combinations. Companion planting is especially good for vegetables, such as basil and tomatoes, as the combination not only helps with pests, but they taste good together also
  • You can pass on your container plants to other people as gifts if they are in portable containers
  • Propagated plants grown around the edge of the container often grow better and quicker as it can be warmer with the sun on the side of the pot
  •  

    Remember the less soil the container has, the less moisture retention the pot will have. In nature, most plants spread out its roots to try to get as much moisture and nutrition as possible, but in a container this is not possible. So self watering pots may need to be used on plants that don’t like to dry out. 

    You will need to add fertiliers or organic mater as watering will eventually make the soil nutrient free. Some container plants will need repotting on occasion which often gives you a chance to propagate some plants by division. Terracotta and ceramic containers tend to absorb moisture from the soil making the plant dry. To avoid this, you can put a plate of water under the terracotta or ceramic pot so that the water gets replenished and soil stays moist.


Posted in Garden, Pests and diseases

Whitefly – What you can do

Whiteflies insects are hemipterans that feed on the undersides of plant leaves. 

 Whiteflies rapidly grow in population when they find a good garden. They can suck the life out of a plants leaves leaving the plant stressed and disease prone. They spread viruses and disease and cause havoc in food production which can cost hundreds of millions of dollars.

IMG_9911-0

You can stop them from landing on your plant by misting the underside of the leaves of the plant several times a day.  

But who has the time to do that? 

 They rapidly grow resistance to chemical pesticides. Obviously these chemicals will detour good insects that you want in your garden.

IMG_9649

They are too small to squash or swat. However whitefly is very attracted to the colour yellow.

IMG_9925
You can see the whitefly attached to my yellow card in less than 5 minutes. 

You can make your own yellow trap with some Vaseline on yellow card, or purchase a set. 

 If you bought one, remove the backing paper so the sticky yellow card is reviled. 

 Hang in a spot near where the whitefly are, but so it won’t stick to anything. Either suspended above the area or level with the infected plant. I like to hang it out of the rain if possible. 

 Place the cards approximately 2 metres apart from each other. 

 Shake the plant every so often so the whitefly will fly. You will be amazed at how they fly directly to the yellow card.
 

The card will last about 6-8 weeks when the temperature is below 28 degrees Celsius. You may need to replace more often if it is hotter or they are full. 

 Any leaves that have been eaten by whitefly should be removed and sealed so re-infestation doesn’t happen. 

 Another method is to grow plants that help reduce whitefly. Nasturtiums are thought to detour whitefly. Zinnias attract predictors that enjoy eating whitefly.

IMG_9648

Whitefly can cause great damage to your vegetables and garden plants such as hollyhocks. But at least they don’t bite you.

Posted in Garden, Natives

Kangaroo Paw

Kangaroo Paw thrives in full sun in well drained soil enriched with organic matter.

They are drought tolerant, however they enjoy a drink every few days during their growing season as it will keep them healthy.

IMG_9868

They resemble the paw of a kangaroo, the flowers will light up the garden in spring and summer in vivid shades of red, green, pink, yellow and brown. You can cut them for flesh flowers and then dry for arrangements.

You can mass plant Kangaroo Paw to attract native birds to your garden. Birds love the nectar rich flowers.

IMG_9906

The above picture is a council traffic island that doesn’t get a lot of attention, yet the Kangaroo Paw has done well. The above Kangaroo Paw has finished flowering and needs to be cut back.

It is easy to increase plant numbers by carefully dividing them after flowering. Try dwarf forms in pots.

Ink disease, a fungus that appears as black blotches on leaves, is a problem with Kangaroo Paw. Remove diseased clumps and replace them with disease resistant cultivars.

IMG_7603

Posted in Flowers, Garden

Sunflowers

This flower is guaranteed to put a smile on a child’s face, especially if you let them plant them.

There are over 70 species in the family which are native to southern and central America.

IMG_9741

Early summer and spring is sunflower planting time. They like compost enriched, well drained soil. They need to be protected against slugs and snails until they start to grow. Their young trunks are susceptible to these pests until they get older with brown stems.

IMG_9642

You may need to stake them or protect them if your in a windy position. Don’t shade them while protecting them. Keep them happy in full summer sun.

Watering is important and keep the weeds away. You can add liquid fertiliser every two or three weeks, but I didn’t to mine as pictured.

IMG_9638

If you wish to collect the seeds, protect the flowers from birds by putting a stocking over the head until the seeds are mature. Your children may not let you do this though. Might be easier to get one when it has been damaged by the wind, birds or old age.

Posted in Garden, Uncategorized

Why Thunderstorms and Lightning are good for the garden.

myproductivebackyard

Lush growth after a series of thunderstorms Lush growth after a series of thunderstorms

This summer has been extraordinary in the garden, it is lushest and greenest I have ever seen it in mid-summer.
I usually spend January trying to supplementary irrigating everything because it is so hot and dry.

Not this year. I cannot seem to keep the lawn under control or keep up with the pruning and hedge trimming. The reason is not only because of all the rain we have been getting, but because the rain has come in the form of thunderstorms.

Thunderstorms result in lightning and although lightning is associated with extreme weather, as long as nobody gets hit or a fire isn’t started, lightning is advantageous for the garden.

Have you ever wondered why the garden looks so green after a thunderstorm?
It is because the chemistry happening in the air above us.

As you are probably aware, about 79%…

View original post 321 more words